Qwen3-VL-4B Colab T4 部署实测:在 Google Colab 免费 T4 上运行 Qwen3-VL-4B-Instruct,关键不只看显卡,还要核对量化配置、旧单元格输出、Gradio 服务端口和分享隧道。本教程记录模型下载、真实图片推理、交互页面启动与排错过程。
Qwen3-VL-4B Colab T4 部署结论:4-bit 量化是关键
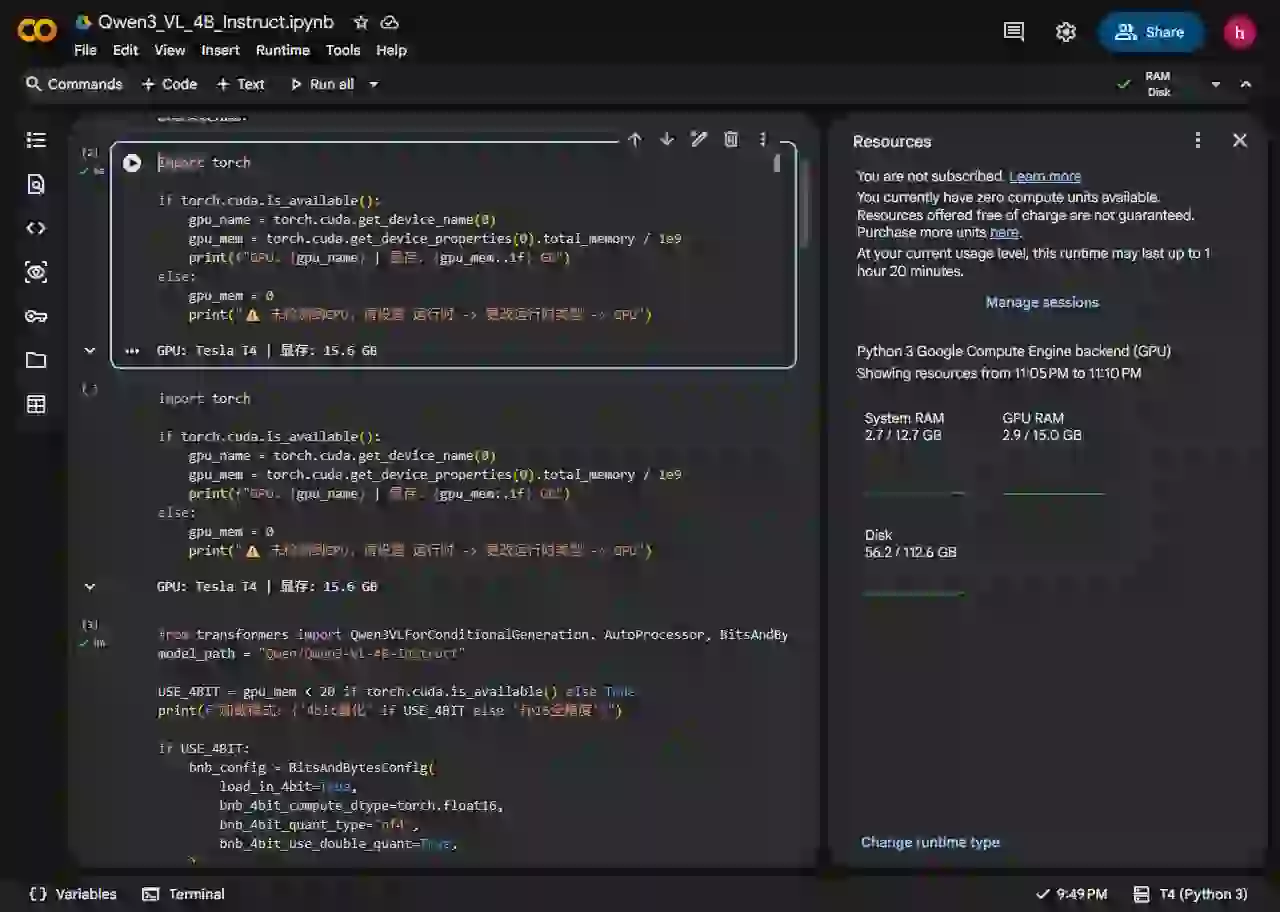
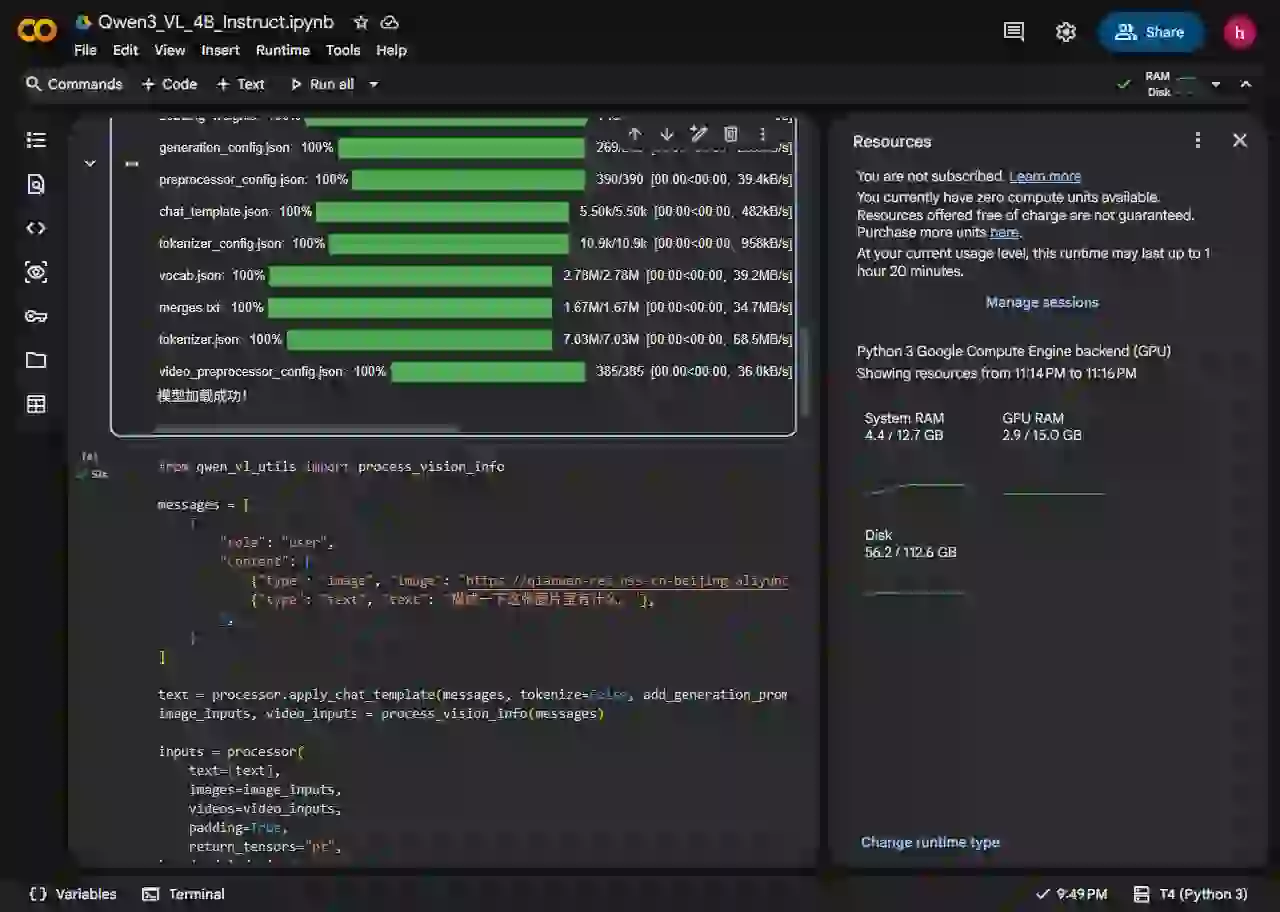
本次 Colab 分配到 Tesla T4,显存约 15.6 GB。使用 Transformers 的 4-bit NF4 量化后,Qwen3-VL-4B-Instruct 权重成功加载;模型仓库实际下载约 8.88 GB,713/713 个权重加载完成。这里验证的是推理与交互,不代表适合在免费 T4 上训练或长期在线运行。
本次部署中遇到的错误与修复
1. 变量不存在:model / processor 尚未初始化
Notebook 里旧输出和当前运行时状态不一致,检查时曾出现 model、processor 未准备好的情况。修复办法是从依赖安装开始,按顺序重新执行环境检查、模型加载,再运行推理;不要只看单元格下方遗留的历史输出。
2. 模型加载与显存:启用 NF4 4-bit
加载单元格明确指定官方仓库 Qwen/Qwen3-VL-4B-Instruct,并配置 BitsAndBytes NF4、double quantization、FP16 compute 与 device_map=auto。T4 上完成了实际加载。Hugging Face 提示未认证请求是速率建议,不是下载失败;本次公开模型仍成功拉取。
3. Colab 里的 Gradio 页面打不开
第一次启动只看到 Colab 的内嵌代理页,测试提问时页面连接丢失并出现 Failed to fetch。排查后发现内嵌端口 7860 已被旧服务占用,重新启动报 Cannot find empty port in range: 7860-7860。将服务改到 7861 后可以启动;再使用 share=True,最终拿到了可访问的临时 gradio.live 公网隧道,并同时保留 Colab iframe 预览。
公网隧道是临时链接,运行时结束或链接过期后就不可用。任何拿到链接的人都可能访问界面,因此演示时不要上传隐私图片或敏感文件。
实测结果:模型能回答,但答案仍需核验
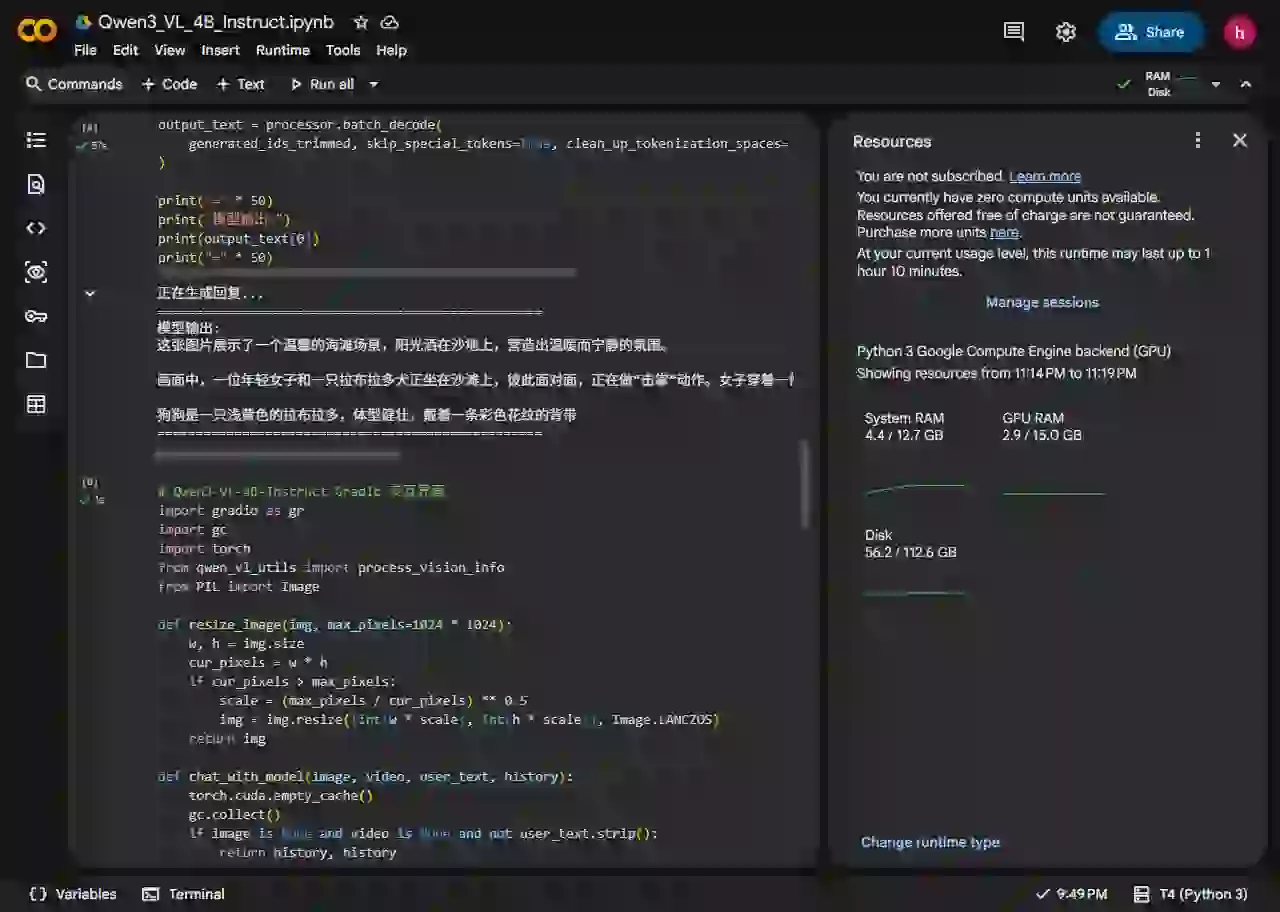
我们让模型分析官方示例图片,推理成功并返回了场景描述,证明图像输入到文本生成的链路打通。模型把狗的品种说成拉布拉多,但仅凭画面无法确认这一判断,说明“成功生成回答”不等于每个细节都正确;重要结论仍要人工核对。
一键部署步骤
- 在 Colab 将运行时硬件设为 T4 GPU。
- 安装 transformers、accelerate、bitsandbytes、qwen-vl-utils 和 gradio。
- 创建 NF4 量化配置并加载 Qwen3-VL-4B-Instruct。
- 先用一张非敏感图片做单次推理,确认模型输出。
- 启动 Gradio;端口使用 7861,只有确实需要公网访问时才设 share=True。
官方模型说明与权重:Hugging Face – Qwen3-VL-4B-Instruct。完整可运行脚本如下;Colab Notebook 文件也可以直接上传运行。
import os
os.environ.setdefault("PYTORCH_CUDA_ALLOC_CONF", "expandable_segments:True")
import gradio as gr
import torch
from transformers import AutoProcessor, BitsAndBytesConfig, Qwen3VLForConditionalGeneration
from qwen_vl_utils import process_vision_info

MODEL_ID = "Qwen/Qwen3-VL-4B-Instruct"
if not torch.cuda.is_available():
    raise RuntimeError("请在 Colab 选择 T4 GPU")
qconf = BitsAndBytesConfig(load_in_4bit=True, bnb_4bit_quant_type="nf4", bnb_4bit_use_double_quant=True, bnb_4bit_compute_dtype=torch.float16)
processor = AutoProcessor.from_pretrained(MODEL_ID)
model = Qwen3VLForConditionalGeneration.from_pretrained(MODEL_ID, quantization_config=qconf, device_map="auto", torch_dtype=torch.float16)
model.eval()

def reply(image, video, prompt, history):
    content=[]
    if image is not None: content.append({"type":"image","image":image})
    if video is not None: content.append({"type":"video","video":video})
    content.append({"type":"text","text":prompt or "请描述媒体内容。"})
    messages=[{"role":"user","content":content}]
    text=processor.apply_chat_template(messages, tokenize=False, add_generation_prompt=True)
    images,videos=process_vision_info(messages)
    inputs=processor(text=[text], images=images, videos=videos, padding=True, return_tensors="pt").to(model.device)
    with torch.inference_mode(): out=model.generate(**inputs, max_new_tokens=256)
    out=[seq[len(src):] for src,seq in zip(inputs.input_ids,out)]
    answer=processor.batch_decode(out, skip_special_tokens=True, clean_up_tokenization_spaces=False)[0]
    history=(history or [])+[(prompt or "描述媒体内容",answer)]
    return history,history

with gr.Blocks(title="Qwen3-VL-4B-Instruct") as demo:
    gr.Markdown("# Qwen3-VL-4B-Instruct 图片 / 视频理解")
    image=gr.Image(type="filepath",label="上传图片(可选)")
    video=gr.Video(label="上传视频(可选)")
    prompt=gr.Textbox(label="输入问题")
    chat=gr.Chatbot(label="对话记录")
    state=gr.State([])
    gr.Button("发送").click(reply,[image,video,prompt,state],[chat,state])
demo.launch(share=True, debug=False, server_name="0.0.0.0", server_port=7861)
本次 Colab 实测截图
以下均为本次 Google Colab T4 部署过程的真实界面截图,图片已转为 WebP。