部署 SCAIL-2 需要较强的硬件配置。由于其核心是一个基于 14B 参数量的 Wan2.1 双流 Diffusion Transformer
架构模型,建议您的电脑配备至少 12GB 显存(如 RTX 3060 12GB)以上的 NVIDIA 显卡,推荐 24GB
显存(如 RTX 4090),且有至少 100GB 的可用固态硬盘空间。
以下为您整理的 Windows 系统本地一键部署 PowerShell 脚本 以及相应的运行和测试指南。该脚本将自动克隆主仓库与子模块、建立虚拟环境、安装支持
CUDA 12.1 的 PyTorch、配置依赖,并提供权重下载器和测试运行脚本。
如果你不想自己动手部署,我们这里有远程部署服务,300元包安装好到你的电脑上,联系微信:SWLK9986第一步:部署前准备
由于 Windows 默认限制未签名的脚本运行,在运行部署脚本前,请以管理员身份打开 PowerShell 并执行以下命令以允许本地脚本运行:
Set-ExecutionPolicy -ExecutionPolicy RemoteSigned -Scope Process第二步:完整本地部署 PowerShell 脚本
请在您想要部署的目录下(例如 D:\AI),新建一个文本文件,重命名为 deploy_scail2.ps1,并将以下代码完整复制进去:
# SCAIL-2 Windows Deployment Script
$ErrorActionPreference = "Stop"

Write-Host "--- Starting SCAIL-2 Setup ---" -ForegroundColor Green

# 1. Check Requirements
Write-Host "[1/6] Checking Environment..." -ForegroundColor Cyan
if (!(Get-Command "python" -ErrorAction SilentlyContinue)) { Write-Error "Python not found."; exit }
if (!(Get-Command "git" -ErrorAction SilentlyContinue)) { Write-Error "Git not found."; exit }

# 2. Clone Submodules
Write-Host "[2/6] Cloning submodules..." -ForegroundColor Cyan
git submodule update --init --recursive

# 3. Create venv
Write-Host "[3/6] Setting up venv..." -ForegroundColor Cyan
if (!(Test-Path "venv")) { python -m venv venv }
. .\venv\Scripts\Activate.ps1
python -m pip install --upgrade pip

# 4. Install Dependencies
Write-Host "[4/6] Installing Dependencies..." -ForegroundColor Cyan
pip install torch torchvision torchaudio --index-url https://download.pytorch.org/whl/cu121
pip install -r requirements.txt
if (Test-Path "SCAIL-Pose") {
    cd SCAIL-Pose
    pip install -r requirements.txt
    cd ..
}

# 5. Download Weights (Simplified)
Write-Host "[5/6] Preparing Weights..." -ForegroundColor Cyan
$downloader = @"
import os
from huggingface_hub import hf_hub_download
os.makedirs("model/1", exist_ok=True)
print("Downloading models...")
try:
    hf_hub_download(repo_id="zai-org/SCAIL-2", filename="Wan2.1_VAE.pth", local_dir=".")
    hf_hub_download(repo_id="zai-org/SCAIL-2", filename="models_clip_open-clip-xlm-roberta-large-vit-huge-14-onlyvisual.pth", local_dir=".")
    hf_hub_download(repo_id="zai-org/SCAIL-2", filename="model/1/fsdp2_rank_0000_checkpoint.pt", local_dir=".")
except Exception as e:
    print(f"Error: {e}")
"@
$downloader | Out-File -FilePath "download_weights.py" -Encoding ascii
python download_weights.py

# 6. Success Message
Write-Host "--- Setup Complete ---" -ForegroundColor Green
Write-Host "To run: .\venv\Scripts\Activate.ps1" -ForegroundColor Yellow
保存该文件后,在 PowerShell 中执行以下命令开始部署:
.\deploy_scail2.ps1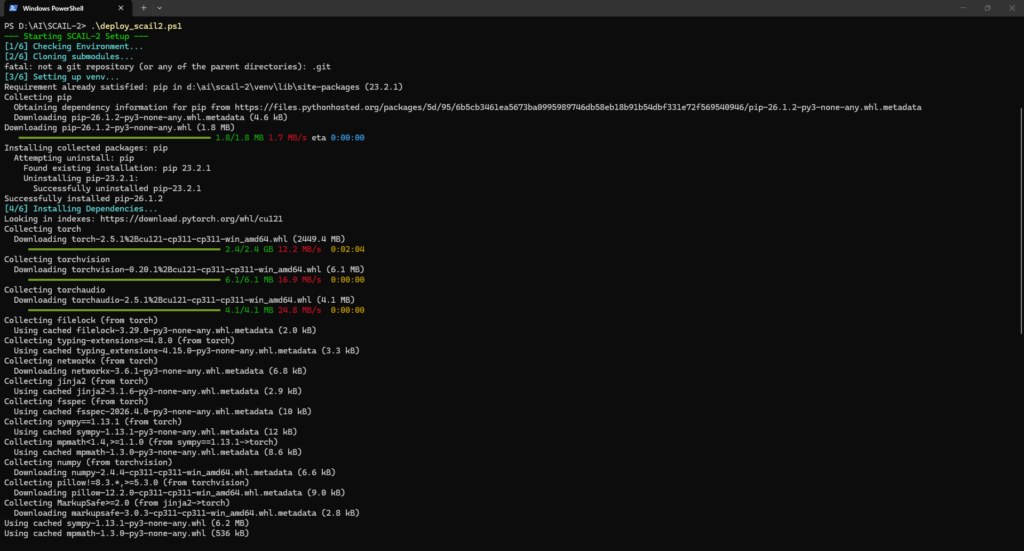
第三步:常见部署问题与调优建议
- 显存不足(OOM – Out Of Memory): 14B 版本的官方权重在 BF16 精度下推理需要消耗较多的显存(>32GB
VRAM)。如果您的显卡显存低于 16GB,运行 test_run.py 可能会提示显存不足。- 解决方案:目前社区(如 ComfyUI 平台)推出了 SCAIL-2 的 FP8 甚至 GGUF (Quantized)
版本的模型。如果您是在消费级显卡上使用,强烈建议通过 ComfyUI 搭配
ComfyUI-WanAnimatePlus 或 ComfyUI-SCAIL-Pose 节点,并加载 FP8 或 GGUF 版本(如
wan2.1_14B_SCAIL_2_fp8_scaled.safetensors)进行推理,可以在 8GB-12GB 显存下流畅运行。
- 解决方案:目前社区(如 ComfyUI 平台)推出了 SCAIL-2 的 FP8 甚至 GGUF (Quantized)
- Windows 编译 Flash-Attention 报错: requirements.txt 中包含 flash_attn。在 Windows
上,flash-attention 往往由于缺少 C++ 编译环境或版本不兼容而导致 pip install 报错。- 解决方案:此项依赖不是必须的,PyTorch 自带的 SDPA (Scaled Dot Product Attention)
会自动接管加速。若报错,可在 requirements.txt 中将 flash_attn
这一行删去或注释掉,重新运行 pip install -r requirements.txt。
- 解决方案:此项依赖不是必须的,PyTorch 自带的 SDPA (Scaled Dot Product Attention)
- 预处理姿态提取(SCAIL-Pose)的使用: 如果您想利用官方代码生成精细的控制: 激活虚拟环境 .\venv\Scripts\Activate.ps1 进入子模块文件夹 cd SCAIL-Pose 按照 POSE_INSTRUCTION 提取参考图像与驱动视频的姿态和掩码 python process_video.py –video path_to_your_driving_video.mp4 处理完成后,相关生成输出会自动输出至对应文件夹,此时再返回根目录运行 generate.py 即可。
电脑 32G内存 3050 8G显卡能装吗?
要装轻量版。
安裝后,内存和硬盤占用100%,怎麽解決?